HOME           ABOUT ME          RECIPES        
Showing posts with label recipe. Show all posts

Sunday, September 4, 2011

Crescent Breakfast Ring

Gotta love Pinterest and all the fabulous food finds! As a matter of fact I have one board full of recipes that I eventually want to try. This morning I got to do just that! I made the super simple "Crescent Breakfast Ring" which consists of crescent rolls, eggs, bacon and cheese. That's it! So simple but the presentation makes it look like you slaved in the kitchen! Here it is after coming out of the oven:


And then sliced:


Oh yeah, baby. 

You can find the recipe at "Bacon Time with the Hungry Hungry Hypo." Just click on the link! The recipe is good as is but next time I might add some sharper cheese, onions, mushrooms and peppers. I'm sure my family would probably love to add some scrambled sausage!

THANKS to Pinterest and good friends with good finds! I'm talking to YOU, Courtney!!! Keep pinning so I can repin! :)

PS Anyone need/want an invitation to Pinterest? Leave me a message with your email addy!


Friday, August 19, 2011

Bake Sale Goodies

Bake Sale time!

But what to make? We only had about two days notice so I had to think fast. Fast, easy and cheap came to mind but I knew my daughter would prefer something "fabulous". Thank goodness for Pinterest and an idea that my girlfriend Emily pinned! Mini Rice Krispie Ice Cream Cones!


Aren't they CUTE? Not nearly as cute as the original recipe but that's okay! I packaged them in pairs in clear cellophane bags and they sold out FAST! I have to admit, it was hard to be humble when the other moms ranted and raved about them. My response, "Ohhh....thanks!" (insert sheepish grin) when I really wanted to respond, "I KNOW RIGHT?!? THEY ARE SOOOOO CUTE!" HA!


So you probably want the recipe? They are basically made up of a miniature cone (they are TINY! Not even 2 inches tall!), Rice Krispie treats, melted candy melts (or almond bark), sprinkles and a candy on top (I used little chewy Sweet Tarts for the "cherry"). Here's where I found the original recipe:
Cute as a Fox. Check her out and be inspired....they are AMAZING!

Of course since this was the first time I made them I did have some set-backs: 

1) My candy melts did not want to melt! It's not like it was my first time doing it so I was a bit baffled. I even tried adding vegetable shortening like the instructions suggested but that didn't work either. Since I didn't have any more on me I had to work with what I had. I ended up molding the chocolate onto the Rice Krispie treats. Sure, it worked but it didn't give it the look of dripping, melting chocolate that I wanted. 

2) Momo (4) REALLY wanted to help me. *Sigh* I put her on sprinkle duty and she sprinkled (POURED?) away. If it were up to her the little cones would be 90% sprinkles and 10% everything else.

3) Much like the instructions on the recipe warned me the little suckers are MASSIVELY top heavy. After putting the cones together the little things would topple over. I tried a few different things - adding frosting or candies to the cone but it just wasn't heavy enough. So, the next time I make them (and I will) I will stuff the cones with Rice Krispie treats as well. I just have to remember to make extra Rice Krispie treats. 


The recipe is definitely a keeper!

P.S. Want an invitation to Pinterest? Leave me your email address and I'll invite you! 

Tip Junkie handmade projects

Thursday, May 26, 2011

Brownie Pops!


Last week I had to make some baked goods for a Girl Scout bake sale. When I asked Kailani what she wanted me to make she said, "Brownies......but not just ANY kind of brownies." I had to laugh. She wants "crafty" brownies. ;)

After scouring the web for ideas I decided to make Betty Crocker's Brownie Pops. They turned out pretty cute and sold out FAST!


As a matter of fact they turned out SO cute that Kailani wanted me to make more for her end-of-the-year class party!

While you can find the recipe here I made a few changes after reading some of the reviews:

  • to make the brownies thicker (and easier to slide a craft stick into) I doubled the brownie mix recipe
  • baked in a 9x13" pan (have to bake a bit longer - I found it was about 10 - 20 minutes more!)
  • instead of chocolate chips I used chocolate flavored almond bark
  • since you have to lay the brownies flat for the chocolate coating to dry I found it's only really necessary to put candy coating and/or chocolate dip one side of the brownie. The other side is going to get smooshed.
  • I cut the 9x13 pan of brownies into 24 pieces - fit perfectly into little bags!

Ohhhhh...the potential to change things up! White chocolate dip! Double dip! Definitely a recipe to keep! 

PS Have anything pretty and/or pink to post? Link up with the "Pinkalicious Thursday Blog Party" hosted by "Frugalicious Me!" And don't forget to check out all the handcrafted ideas at "A Crafty Soiree" hosted by "Katie's Nesting Spot!"


Katie's Nesting Spot

Friday, April 8, 2011

Monkey Bread Recipe


Yummy, sticky, sweet, buttery, "cinnamony," sugary, hot MONKEY BREAD!

Ohhhhhh......yeah.

My girls LOVE cinnamon rolls so I asked them if they wanted to make some of their own, monkey bread style. 

Monkey bread? What is monkey bread? And why is it called that? Well, monkey bread is basically little rolled pieces of dough dipped in a cinnamon-sugar mix, piled into a bundt pan, then covered in a buttery-sugary topping (yes, more sugar!) and baked. Can you say "SINFUL?!?" 

And apparently it got it's name because people look like monkeys when they pull off pieces to eat. Ah-ha! Now it makes sense!

Well, my little monkeys didn't need any convincing to make it. Sugar? Cinnamon? Bake? It's like crafting with food! They were SOOOOOO "IN".

I started off by prepping the ingredients and let them roll the dough and dip it into the cinnamon sugar mix. They then tossed (literally) the balls into the pan and baked it. After a few short minutes the kitchen started to smell HEAVENLY. Here's what it looked like when it first came out of the oven:


And here's what it looked like flipped over and out of the pan:


And here is what Kailani wanted to do:


Easy, girl. Easy.

Verdict? Deeeeeelicious!

We used one of the monkey bread recipes from AllRecipes but I'll also post it here. Tastes great reheated the next day (that is if you HAVE any leftovers!) It's also a great playdate activity if you've got lots of little ones that want to help! 

*Note - the cinnamon/sugar mixture makes a LOT and we had quite a bit left over. Next time I will only make half. 

Ingredients

  • 3 (10 ounce) packages refrigerated biscuit dough
  • 3/4 cup white sugar
  • 3 tablespoons ground cinnamon
  • 1/2 cup margarine
  • 3/4 cup white sugar

Directions

  1. Mix together 3/4 cup sugar and cinnamon.
  2. Quarter the biscuits with kitchen shears. Dip shears in water after each cut to keep the biscuits from getting too sticky. Dip biscuits into sugar mixture, and place in a greased tube pan. Do this until all biscuits are used.
  3. Melt butter or margarine, and mix in 3/4 cup sugar. Pour mixture over biscuits.
  4. Bake in a preheated 350 degree F (175 degrees C) oven for 30 to 35 minutes.

Sunday, December 12, 2010

Reese's Peanut Butter Cup Cookies

My most favorite cookie EVER! I've been making these for years!


You can find the recipe on the back of some of the miniature Reese's Peanut Butter Cup bags but I use a slightly different version that is posted at AllRecipes. Even with that recipe I do a couple of things differently. 

First off, to keep the peanut butter cup from melting and losing it's shape I freeze them ahead of time. I also recommend using a medium sized cookie scoop (measures about 1.75" across) - when you use the scoop the cookies end up being the same size and they bake evenly. Instead of ending up with 40 cookies (as the recipe states) in my version you end up with approximately 28.  However, since mini-muffin pans have only 24 cups you could save some time and add a tad bit more dough to each cookie.....

Here's the recipe: 

Ingredients:

1 3/4 cup flour
1/2 teaspoon salt
1 teaspoon baking soda
1/2 cup butter, softened
1/2 cup white sugar
1/2 cup peanut butter
1/2 cup brown sugar, packed
1 egg, beaten
1 teaspoon vanilla extract
2 tablespoons milk
28 miniature Reese's Peanut Butter Cups (frozen - put in freezer for at least 30 minutes)

Directions:
  1. Preheat oven to 375 degrees F. Sift together the flour, salt and baking soda; set aside.
  2. Cream together the butter, sugar, peanut butter and brown sugar until fluffy. Beat in the egg, vanilla and milk. Add the flour mixture; mix well. 
  3. Scoop cookie dough using the medium sized cookie shape dough into 28 balls and place each into an ungreased mini muffin pan.
  4. Bake at 375 degrees for about 9 minutes. While the cookies are baking remove the wrappers from the miniature Reese's Peanut Butter cups.
  5. When cookies are done baking remove them from the oven and immediately press a mini Reese's Peanut Butter Cup into each cookie. Cool and carefully remove from pan (I use a small spoon to help lift them it out.)


Cooling in the pan....

This baby's got some height and weight to it!


Wrapped and ready for a cookie exchange!

Thursday, November 25, 2010

Happy Thanksgiving!

Happy Thanksgiving! So much to be thankful for!

This morning I got to sleep in for a whole extra 20 minutes! WHOO -HOO! (Hey, I'll take what I can get!) 

Soon after we woke Kailani saw a rainbow....right next to the moon that hadn't yet set:


WOW. What an awesome way to start the day!

Another awesome thing was that I wasn't expected to cook a big elaborate Thanksgiving feast. Whew! Thank goodness for Thanksgiving dinner packages offered by nearby restaurants! So, without having to dedicate all that time in the kitchen I used the time to do some fun domestic stuff with the girls. 

Since I opted out of ordering or making the traditional pumpkin pie I decided to have the girls help me with a local Hawaiian/Japanese favorite, pumpkin mochi! If you've never had mochi it's a bit hard to describe. It's gooey, it's sticky, it's yummy....but a lot of people can't get past the texture. Having grown up eating it I don't have any problems with it. The problem I DO have with mochi is that, well, I LOVE it TOO darn much! 


Busy at work!

Using the recipe from AllRecipes here's how it came out:

No.....it's not pumpkin pie but pumpkin mochi with a dollop of whipped cream!

I don't normally cut pumpkin mochi this way but I thought I would try to psych Kailani out and it worked. She truly thought it was pumpkin pie but was not at all disappointed to find out it was pumpkin mochi. 
 
Pumpkin Mochi

Usually I cut the mochi into bite size pieces. BIG bite size pieces. HA!

After we made the pumpkin mochi we then made pumpkin pie playdough! It was easy, fun, and smelled heavenly! And it was SUPER soft....but not so soft that you can't mold it. According to the instructions the play dough will keep for about a week if you store it in a sealed plasItic bag. (By the way...it also says you need 2-3 hours to make it but it took more like 45 minutes - and that's with having to stop to help the girls with the mixing.Thought it was worth a mention.)   

Pumpkin Pie Spice Play Dough

The girls attempted to make some pumpkins out of the pumpkin play dough.

The play dough kept them occupied for a good chunk of the afternoon. Kailani also used cookie cutters and had her own little bakery going. Check out the sign she posted for her shop:


Notice that the cookies are $.25 but tips are $1.00 or $.50. Well, that is if you don't get the "other cookies" for $.99. What an imagination this kiddo has! 

Hope you had a great Thanksgiving!

Saturday, November 20, 2010

Pizza Swirls


My friend, Lei recommended that I try out this recipe and I'm so glad that she did! It was a huge hit in our house....everyone loved it (and that's rare. There's always someone that isn't pleased - isn't that always the case?)

I was a bit intimated about baking my own bread but in the end it was worth it and not nearly as difficult as I imagined. The bread was PERFECT! So incredibly soft! I made one roll with pepperoni and one without. While there were a few leftovers they were gobbled up for breakfast! 

Lei found the from Allrecipes but I will post it here as well. The changes I made (just a few) are in blue.

Ingredients:

Bread:
1 (.25 ounce) package active dry yeast
1 1/3 cups warm water (110 degrees to 115 degrees F)
1/4 cup vegetable oil
1/2 teaspoon sugar
1/2 teaspoon salt
3 3/4 cups all-purpose flour

SAUCE:
1/4 cup chopped onion
2 garlic cloves, minced
1 (8 ounce) can tomato sauce
1/4 teaspoon dried basil

TOPPINGS:
4 cups shredded mozzarella cheese, divided
2 (3 ounce) packages sliced pepperoni (we used turkey pepperoni and only used one package. I chopped the pepperoni into small pieces.)
1 (2.25 ounce) can chopped ripe olives, drained (we did not add olives)


Directions:

In a mixing bowl, dissolve yeast in warm water.
Add oil, sugar, salt and 2 cups flour; beat until smooth.
Stir in enough remaining flour to form a soft dough.
Turn onto a floured surface; knead until smooth and elastic, about 6-8 minutes.
Place in a greased bowl, turning once to grease top.
Cover and let rise in a warm place until doubled, about 1 hour.

Preheat oven to 400 degrees.

Punch dough down.
Turn onto a floured surface; divide in half.
Roll each portion into a 12-in. x 8-in. rectangle; set aside.


For sauce, combine the onion and garlic in a microwave-safe dish. Cover and microwave on high for 1 minute.
Add tomato sauce and basil; cover and cook at 50% power for 3 minutes or until bubbly.
Spoon over crust to within 1/2-in. of edges.
Sprinkle with 3 cups mozzarella cheese, pepperoni and olives.


Roll up jelly-roll style, starting with a long side; pinch seam to seal.
Cut each roll into 12 slices.
Place cut side down on a greased baking sheet.
Sprinkle with remaining cheese.
Bake at 400 degrees for 15 minutes or until crust is golden and cheese is melted.
Serve warm.

There are so many variations that you could do with this recipe - buy store bought dough  and/or store-bought spaghetti sauce....but seriously.....I'd leave it just the way it was written! This recipe is definitely a KEEPER!

Saturday, November 13, 2010

Dorito Casserole

Dorito Casserole                    


Yeah. You read that right. DORITO casserole! The oh-so-yummy-super-cheesy-chips-that-leave-an-orange-coating-on-your-fingers-that-you-have-to-lick-them-off Doritos. Now, you are probably totally intrigued or grossed out but you know you're curious (much like a bad accident on the side of a freeway!) 

This casserole is definitely not for the calorie counter (though you can substitute items to make them "healthier".) And may I also suggest, if you plan on making this buy an extra bag of Doritos because I have found that once the bag is open little fingers can't keep their hands out of them. Big fingers too. My husband ate some of the Doritos I had put to the side for the casserole topping. Trust me, he got a scolding! The proof is in the picture. Do you see any Doritos on top? Nooooo.....(though there are probably a few under the mound of cheese!)

Kids enjoy helping with this casserole. Ask them to crush the Doritos for you. But then look for the double-dipping that will most likely occur (crush Doritos, lick fingers. Crush Doritos, lick fingers. Yeah, don't have them help if you are feeding the casserole to people other than your own family!)

Anyways. Here's the recipe. I got the original recipe here but I add a pound of cooked ground turkey. Lots of different ways to alter it to your liking!

Casserole Ingredients:
" 1 large 13-ounce package of Doritos (save 2 cups for casserole topping)
" 2 tbsp. onion, grated
" 1 10-ounce can of chili with beans
" 10- to 15-ounce enchilada sauce
" 8-ounce can tomato sauce
" 1½ cups of shredded sharp cheddar cheese 
" optional - 1 lb ground turkey
 
Topping Ingredients:
" 2 cups Doritos
" 1/2 cup of shredded cheddar cheese
" 1¼ cups sour cream
 
Casserole Directions:
 " optional - cook 1 lb ground turkey. Set aside and let cool.
" Preheat oven to 375 degrees.
" Crumble 6 cups of Doritos with your hands into a large mixing bowl.
" Add the onion, the chili, the enchilada sauce, tomato sauce and 1½ cups of cheddar cheese to the crumbled Doritos (also add 1 lb ground turkey). Stir with a rubber spatula to combine. Place mixture into an 8½ x 11-inch oven-proof casserole dish.
" Bake for 20 minutes.
" Remove from the oven. Spread the sour cream over the top of the casserole with a large spoon or rubber spatula. Top with remaining 2 cups Doritos. Then sprinkle with the 1/2 cup of the cheddar cheese.
" Bake for another five minutes and serve. 

The casserole reheats well but may I suggest adding some fresh Doritos to the top for the crunch factor. That is, if you have any Doritos left. 

By the way - I have made this for play dates and while people make little snippy comments, there is never any leftovers! As a matter of fact when I made it last night both my kids cleaned their plates and my husband went back for THIRDS (which is very unusual!) 

Friday, October 15, 2010

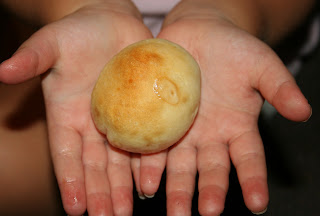
Mini Manapuas

Lately Kailani has taken a liking to char siu - Chinese barbequed pork. I figured I'd better find a recipe and start cooking some at home! Then I remembered while living in Virginia a friend sending me an awesome care package from Hawaii with all of my favorite local-kine snacks. She also included a recipe for manapua (barbeque pork filled buns) and the spices to make them. Ahhhhh! Steamed/baked buns with char sui filling! I decided to make them tonight for my girls. I knew they would love it!  


Yummy! Or "ono" as we say in Hawaii! They are small....but a little bigger than a donut hole. Check them out in Momo's hands:


If you are seeking an easy manapua recipe here's the one I used: 

Mini Manapua

1/2 lb. ground pork or hamburger
1/4 c. chopped green onion
    1/4 c. minced water chestnuts
    2-3 tbsp. char siu powder mix:
    2 cans refrigerator buttermilk biscuits

Brown ground pork or beef; add water chestnuts and char siu powder. Add green onions and turn off heat.  Drain oil and let cool.

Flatten biscuit in your hand to create a 2 inch round circle. Place a heaping teaspoon of filling in center of biscuit. Pinch edges of biscuit closed and place on waxed paper.

(Optional: place a dot of red food coloring on the top of each manapua.)

Bake for 10-12 minutes in 350 degree oven or steam for 15 minutes in steamer. Makes 20 manapuas.

How did the girls like them? Well, honestly......Momo wouldn't eat one (because I also made chow funn noodles, which she loves) and Kailani only ate the breaded part of the manapua. ARRRRGH. Eight-year olds....I swear!

Wednesday, April 14, 2010

Macaroni and Cheese Cups

We've got the sickies in our house! Fever, coughing, whining.....thank goodness no vomiting! So I feel as if I have been cooped up and unproductive. You would think that by being "stuck" at home I would get a lot of sewing, cleaning, etc. done but when constantly interrupted by two little ones....I give up!

*Sigh*


But I still have to feed the family. I've tried a couple of new recipes over the last couple of days and thought I'd share one with you all...macaroni and cheese cups.
The first time I had these was about two years ago - when my fabulous cook of a brother-in-law made some fancy-schmancy ones. I believe he used this recipe or something similar. I'm embarrassed to say that I couldn't stop shoveling them into my mouth. Actually - EVERYONE was. I would've fought for the last one...but that would be rather immature, right? ;) Anyways. I made something similar last night tweaking different recipes I found on the internet:

Here's one on it's own little special plate.
It deserves it's own plate. Trust me.


Ingredients:
  • 3 tablespoons butter, divided
  • 2 tablespoons all-purpose flour
  • 1 cup milk
  • 1 teaspoon salt
  • 1/2 teaspoon black pepper
  • 1 cup shredded sharp cheddar cheese
  • 1 cup shredded Colby Jack cheese
  • 1/2 pound uncooked elbow macaroni, cooked and drained
  • 1/3 cup toasted bread crumbs
Instructions:
  1. Preheat oven to 400 degrees.
  2. Melt 1 tablespoon butter in a small saucepan over low heat. Grease muffin cups with butter. Alternative - spray muffin tins with non-stick cooking spray. I did this on my second batch and didn't notice a difference in looks or taste. That'll save you a few calories.
  3. Melt remaining 2 tablespoons butter in large saucepan over medium heat. Whisk in flour; cook 2 minutes. Add milk, salt and pepper; cook and stir 3 minutes or until mixture is thickened. Remove from heat; stir in cheeses. Fold in macaroni.
  4. Divide macaroni and cheese among prepared muffin cups. (Note - I used a regular size 12-count cupcake/muffin pan and made 16 macaroni cups.) Top with toasted bread crumbs.
  5. Bake 20-25 minutes or until golden brown. Cool 10 minutes in pans, remove carefully using sharp knife.
They also reheat well. I know. I just ate three of them. ;)

Thursday, April 8, 2010

4 Crazy * Kings * Hawaiian Bread....

I want to thank Mama King of 4 Crazy Kings for the shout out on her blog! She was the winner last month of my apron giveaway. She really knows how to show her appreciation and make a girl feel good. :) Check out her blog - she is definitely my "go-to-gal" when I need some ideas or inspirations..especially for kid's crafts!

Speaking of Kings......

Another cool thing - remember the "King's Hawaiian Bread - Turkey & Cheese Sandwich" recipe I posted? Well I entered the recipe and picture in a contest that was being held on the King's Hawaiian Bakery Facebook page and won! Now my little avatar picture of me and my girls is on the King's Hawaiian Bakery website (page 2) for a short time. You'll notice that my picture is not posted with my recipe but with a professional photo and recipe of their choice. That's okay! ;)


Are you wondering what I won? I wish I could say that I won a year's worth of King's Hawaiian bread but I wasn't THAT lucky. I did, however win a free King's Hawaiian product of my choice (which I already picked up and ate.) By the way, you can sign up for coupons and great savings from King's Bakery here.

Super cool. :)

Sunday, March 21, 2010

King's Hawaiian Bread - Mini Turkey & Cheese Sandwiches


Growing up as a military brat I spent a majority of my childhood living in Japan. My father was in the Air Force and at times had to go TDY (temporary duty assignment) back to the United States. On occasion I remember him bringing back King's Hawaiian Sweetbread - you know, the kind in the round pan? We wouldn't even cut slices - we'd just tear off big hunks of bread and eat it.

Now I have kids of my own and guess what? Surprise, surprise....they love King's Hawaiian bread as well. It's a toss-up though, between the original sweet bread and the savory butter! The rolls are the perfect size for mini sandwiches!

One of my favorite sandwiches to make for potlucks is mini turkey and cheese sandwiches with a poppy seed topping. The recipe can be found via AllRecipes - but I'll post it here as well. The original recipe calls for chopped ham but I substitute chopped turkey. I also always use King's Hawaiian bread - "Savory Butter". Here's the recipe:

Ingredients:
2 Tbsp dried minced onions
2 Tbsp prepared mustard
2 Tbsp poppy seeds
1/2 cup butter, melted
24 dinner rolls - I prefer 2 packages of King's Hawaiian savory butter
1/2 lb chopped turkey
1/2 lb thinly sliced Swiss cheese (I use 1/2 slice of Swiss cheese per sandwich)

Directions:
  1. Preheat oven to 325 degrees.
  2. In a small mixing bowl combine onion flakes, mustard, poppy seeds and butter.
  3. Split each dinner roll. Make a sandwich of the ham and cheese and the dinner rolls. Arrange the sandwiches on a baking sheet. Drizzle the poppy seed mixture over the sandwiches.
  4. Bake for 20 minutes or until cheese has melted. Serve warm. (They reheat well - that is IF you have any leftovers!)

Thursday, April 16, 2009

Colorful Cookies!

Awhile back I laid my eyes upon these cookies. Aren't they awesome? So colorful and happy!

This morning I finally decided to test out the recipe.

Results? Ummmm....not good.


So I decided to try and make them AGAIN this afternoon (yes, I can be quite stubborn!) Status? They came out okay. Not great but definitely better than the morning batch!


I'm not sure what I did wrong. The instructions say to roll the dough (like you would if you were to make a snake out of Play Doh) 12" long and then coil it. However after baking you can definitely see the coils in my cookies - unlike the cookies in the original recipe. I tried flattening out some of the coils before baking them but it didn't seem to make a bit of difference. I guess all in all who cares? But I SO wanted to make them like in the picture! If anyone knows please tell me so I can stop obsessing over it!

*Sigh* So the cookies aren't perfect. But you w
anna know what happens when you give imperfect cookies to the kiddos?


Enough said. :)

Thursday, April 2, 2009

Hippity Hop....No...It's a Flop

Easter is around the corner! I'm so not ready! I want to make some bunny hats, Easter cards and dresses but I'm so behind! But thinking of Easter reminded me of some cupcakes that I made several years back:


YIKES! I just realized the photo says "2004". That was a long time ago....

Anyways. These little Peep cupcakes were really easy to make (and were quite the hit at the party!) You could probably wing it without instructions, however, if you would like them please let me know and I'll post the recipe.

Speaking of winging it:

Okay. I desperately need to go grocery shopping. We're down to the bare bones. I was half tempted to feed my kids cereal tonight except for the fact that we already had "breakfast for dinner" (pancakes) this week!

Yesterday while at the doctor's office I actually had a minute to sit down and flip through a magazine. I couldn't put down this month's issue of "Parents." I was half tempted to shove the magazine in my diaper bag but instead made a mental note to go out and buy one. Easier said than done. Couldn't find it anywhere! I really wanted to make the breadstick snails but couldn't remember what the instructions said to do. And of course I couldn't find the recipe online until after the fact... so I winged it.

Hmmmmm.

My snails didn't quite look like snails. But they kinda looked like bunnies! Perfect! Easter is around the corner. I put some cut up cheese sticks onto some toothpicks, molded a cheese tail and ta-da! We have a bunny! (So I hoped it would pass as one!) Nope.


I know, I know...there is so much I could've done to make it look better but trust me, my cupboards are bare and creativity is lacking!

Here is what it is supposed to look like (picture courtesy of "Parent" Magazine):


*Sigh* Okay. So I doubled the dough for each snail; didn't use any pesto (kids probably wouldn't eat it anyways!) and rolled the little buggers up the opposite way. Oh well. At least the kiddos chowed them down. That's what truly counts, right?